
Have you ever found yourself searching for a light and refreshing dish that complements any meal? A Pear Salad is the perfect answer, offering a delightful blend of sweetness and crunch that elevates your dining experience. This recipe combines juicy pears with crisp greens, creating a harmony of flavors that’s just right for warm weather or as a side for heartier main courses.
Many people struggle with balancing flavors in salads, often ending up with combinations that feel flat or boring. This version of Pear Salad stands out because it includes ingredients that enhance each other beautifully, like tangy cheese and a zesty dressing that ties everything together. You’ll find it easy to whip up, ensuring you can impress your friends and family with minimal effort. So, let’s dive in; the steps are simple to follow!
Why You Should Make Pear Salad
• This pear salad is quick to prepare, taking just 15 minutes from start to finish.
• It features simple steps, making it perfect for cooks of all skill levels.
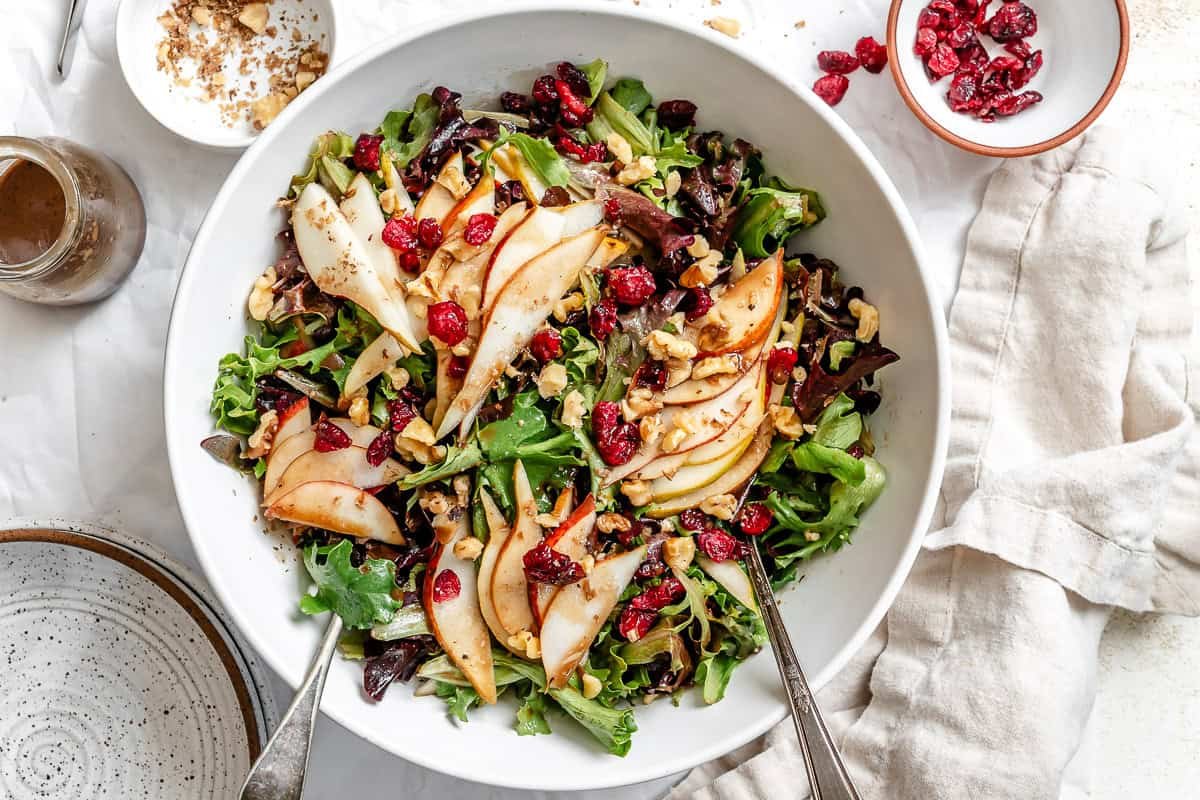
• The combination of fresh pears and vibrant greens creates a refreshing taste that brightens any meal.
• It’s a great light option, ideal for a healthy lunch or side dish.
• The salad can be easily customized with your favorite nuts or cheeses for added flavor.
• People will love the effortless elegance it brings to any dining occasion.
Recipe Highlights
| Prep time | 15 minutes |
| Cook time | – |
| Total time | 15 minutes |
| Servings | 4 |
| Calories per serving | 200 |
| Difficulty | Easy |
| Cuisine | American |
| Course | Salad |
| Diet tags | Vegetarian |
| Best time to eat | Lunch |
| Main flavor notes | Sweet, Crisp |
Ingredients
• 4 ripe pears, cored and sliced
• 4 cups mixed salad greens
• 1 cup toasted walnuts
• 1/2 cup crumbled feta cheese
• 1/4 cup balsamic vinaigrette
• Salt and pepper to taste
Optional
• 1/4 cup dried cranberries
• 1/4 cup fresh mint leaves
Equipment Needed
– Mixing bowl
– Whisk
– Cutting board
– Knife
– Salad plates
– Serving spoon
– Grater
How to Make It
1. Begin by selecting ripe pears that are firm but slightly yield to pressure, indicating they are ready to eat. Wash them thoroughly under cold running water to remove any surface residues.
2. Cut the pears in half lengthwise and remove the cores with a small knife or melon baller. The flesh should be smooth and white, with a hint of sweetness noticeable as you cut.
3. Slice the pear halves into thin wedges, aiming for uniform thickness for even texture in the salad. You may notice the fresh pear aroma as you slice.
4. In a large mixing bowl, combine the sliced pears with a handful of mixed greens. Look for a vibrant mix of colors—bright greens from the lettuce and the creaminess of the pear slices.
5. Next, add finely crumbled feta cheese to the bowl, spreading it evenly among the greens and pears. The cheese will contrast nicely with the sweet pears both in texture and in taste.
6. Drizzle your favorite vinaigrette dressing over the salad components, ensuring you achieve a light coating. The dressing will enhance the salad’s aroma and provide a glossy look to the ingredients.
7. Using a pair of salad tongs, gently toss the ingredients together in the bowl. Be careful not to mush the pears or cheese, allowing the salad to maintain its structure and freshness.
8. If you plan to serve the salad later, cover the bowl with plastic wrap and refrigerate for about 30 minutes. This will allow the flavors to meld, and you’ll notice a refreshing chill in the salad when served.
9. When ready to serve, give the salad another gentle toss to distribute any settled dressing. The smell should be inviting, combining the sweetness of pears and the tanginess of feta.
10. Serve the salad on chilled plates to enhance the coolness, and garnish with additional feta or a sprinkle of nuts if desired. The final presentation should be colorful and enticing, ready for enjoyment.
11. Keep any leftovers refrigerated and consume within two days to ensure freshness. Always store leftovers in an airtight container to prevent wilting and maintain flavor.
Pear Salad: Tips for Perfecting Your Dish
1. Choose firm, ripe pears for the best texture; overripe pears may become mushy in the salad.
2. For added crunch, mix in toasted nuts such as walnuts or pecans right before serving.
3. Use a sharp knife to slice the pears; this will ensure clean cuts and a more attractive presentation.
4. Dress the salad just before serving to prevent the greens from wilting and losing their crispness.
5. To achieve a balanced flavor, add a pinch of salt to your dressing; it enhances the sweetness of the pears.
6. Incorporate a touch of acidity, like lemon juice or balsamic vinegar, to brighten the flavors and prevent the pears from browning.
7. Experiment with different greens; arugula adds peppery notes, while spinach offers a milder taste.
8. Consider adding fresh herbs, such as basil or mint, for an unexpected flavor boost and visual appeal.
Dietary Variations and Substitutions
• For a gluten-free version, substitute all-purpose flour with almond flour or a gluten-free flour blend.
• To make the recipe vegan, replace eggs with flaxseed meal mixed with water or unsweetened applesauce.
• For a dairy-free option, use coconut milk or almond milk instead of regular milk.
• If you’re looking to reduce sugar, use ripe bananas or applesauce as a natural sweetener.
• To add protein, consider incorporating cooked quinoa or chickpeas into the recipe.
• For a low-carb alternative, swap starchy ingredients with spiralized veggies like zucchini or carrots.
• Use nutritional yeast instead of cheese for a dairy-free cheesy flavor.
• For a nut-free version, replace nut-based ingredients with seeds like sunflower or pumpkin seeds.
Serving Ideas for Your Dish
This recipe is ideal for a cozy family dinner or a casual gathering with friends. To enhance the dining experience, consider serving it with a light green salad dressed in lemon vinaigrette. The acidity will balance the richness of the main dish beautifully.
Another great option is to serve crusty artisanal bread on the side. This is perfect for soaking up any remaining sauce, making sure not a drop goes to waste. Pairing with a simple herb butter spread can elevate the flavors even further.
For a complete meal, finish off with a seasonal vegetable medley sautéed in olive oil and garlic. This adds a pop of color and freshness that complements the main dish nicely.
If you’re aiming for something more festive, consider a side of roasted potatoes seasoned with fresh rosemary. Their earthy flavor will enhance the overall experience without overwhelming the palate.
Lastly, when it comes to dessert, a light fruit sorbet or tart would make for a refreshing end to the meal. This keeps the overall dinner balanced and enjoyable from start to finish.
Storage and Reheating Instructions
To maintain the freshness and quality of your Pear Salad, follow these storage and reheating guidelines:
Refrigerator Storage
Store your Pear Salad in an airtight container in the refrigerator. It is best consumed within 2 to 3 days for optimal taste and texture. If possible, keep the dressing separate until serving to prevent the salad from becoming soggy.
Freezer Storage
Freezing is not recommended for this salad, as the texture of the ingredients, particularly the pears and greens, may be compromised upon thawing.
Room Temperature
If serving at room temperature, limit the time the salad stays out to no more than 2 hours. If the temperature exceeds 90°F, reduce this time to 1 hour to ensure food safety.
Reheating Instructions
For salads that require reheating, such as those containing grains, use the stovetop or microwave.
Stovetop Method:
Place the salad in a pan over low heat, adding a splash of water or broth to keep it moist. Stir occasionally to heat evenly and avoid burning.
Microwave Method:
Transfer the salad to a microwave-safe dish and cover with a damp paper towel. Heat in 30-second intervals, stirring between each, until warmed to your liking.
To prevent drying out or a soggy texture, keep the reheating time short and use moisture as needed. Avoid reheating leafy greens if they were previously coated in dressing. Instead, serve fresh dressing on the side after reheating.
Nutrition Note
This Pear Salad features a combination of fresh pears, leafy greens, nuts, and cheese, creating a nutrient-rich dish. Pears provide dietary fiber that can support digestive health, while the greens contribute vitamins and antioxidants. The inclusion of nuts adds healthy fats and protein, which can enhance satiety. If cheese is used, it offers calcium and additional protein. Overall, this salad provides a balanced mix of carbohydrates, fats, and proteins, making it a satisfying choice. Enjoy it as a light meal or a refreshing side dish, and feel free to customize it with your favorite ingredients for added nutrition.
Frequently Asked Questions about Pear Salad
1. What can I substitute for pears in this salad?
You can use apples or sliced peaches for a similar texture and sweetness. Citrus fruits like oranges can also add a refreshing twist.
2. How should I store leftover pear salad?
Store leftover salad in an airtight container in the refrigerator. It’s best consumed within 1 to 2 days to prevent the pears from browning.
3. What are common mistakes to avoid when making pear salad?
Avoid using overripe pears, as they can become mushy. Also, skip adding acidic dressings too early, which can cause the pears to become unappetizingly soft.
4. How long can I keep pears before using them in the salad?
Pears should be used when they’re ripe but still firm, typically around 2 to 5 days after purchasing depending on their ripeness. Check daily for ripeness if you want them at their best.
5. What is the best way to slice pears for salad?
Slice pears thinly to allow for even distribution in the salad. You can also cube them if you prefer a more textural bite.
6. How many servings does this pear salad recipe yield?
Most pear salad recipes yield about 4 to 6 servings, depending on portion size. Adjust the ingredients as necessary for larger gatherings.
7. Can I prepare the pear salad in advance?
It’s best to prepare the salad no more than a few hours in advance to maintain the freshness of the pears. If making ahead, add the dressing just before serving.
8. What greens pair well with pear salad?
Mixed greens like arugula or spinach complement pears nicely. You can also use a blend of lettuce for added texture.
9. How can I make this salad more filling?
Add protein sources like grilled chicken, goat cheese, or nuts to make the salad more substantial. Quinoa or farro can also be great additions.
This Pear Salad is a delightful balance of sweetness and crunch, with each bite offering a refreshing experience. The combination of ripe pears, crisp greens, and a light dressing creates a vibrant dish that feels both satisfying and invigorating.
Perfect for lunch or as a side for dinner, this salad is incredibly easy to prepare. Whether you’re hosting a gathering or enjoying a quiet meal at home, it adds a touch of elegance and flavor without requiring extensive effort. Discover how this simple recipe can elevate your dining experience and become a staple in your meal rotation.